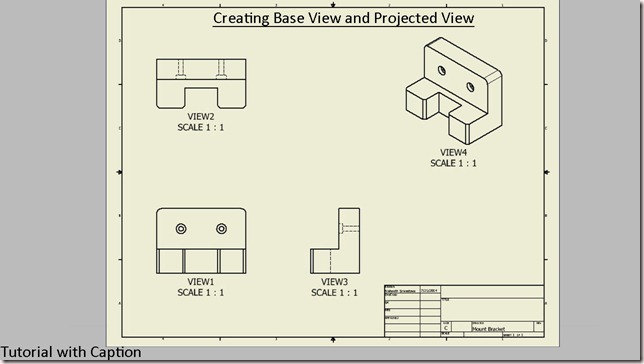
This video tutorial displays how to create Base View and the Projected View along with View name and Scale label in a Drawing Sheet.
Click the following link to get the model file: - http://bit.ly/2JUuyRL
Transcription of Video
- Here a blank drawing sheet is open, using the ANSI (mm).idw template.
- Right click in the graphics window and activate the ‘Base View’ command.
- Drawing View dialog box is visible in the design window.
- Click the ‘Open an existing file’ icon.
- Open the Mount Bracket.ipt file.
- In the Orientation field, there are different types of pre-defined view orientations that can be placed in the drawing page.
- Front view is selected by default.
- By default the view scale is 1:1 of the model which can be changed from here.
- If you hover the mouse over the drawing sheet, a preview of the Mount Bracket will be visible with the front view in the design window.
- Click the left mouse button at the bottom of the page. Then move your cursor upward and left side from the base view followed by clicking the left mouse button.
- At last, move the cursor on the upper right corner of the design window for placing the isometric view.
- Right click in the graphics window and click Create button in the context menu to generate the desired views.
- Save the drawing sheet with the name Mount Bracket.
- Double click the Base view to edit it.
- Click the ‘Toggle Label Visibility’ icon to show the View name and Scale label on the drawing sheet.
- Click OK to close the dialog box.
- In the same way edit the three other projected views.


No comments:
Post a Comment